Eye Contact
Make your subject look into the lens after the shoot.
1. Description
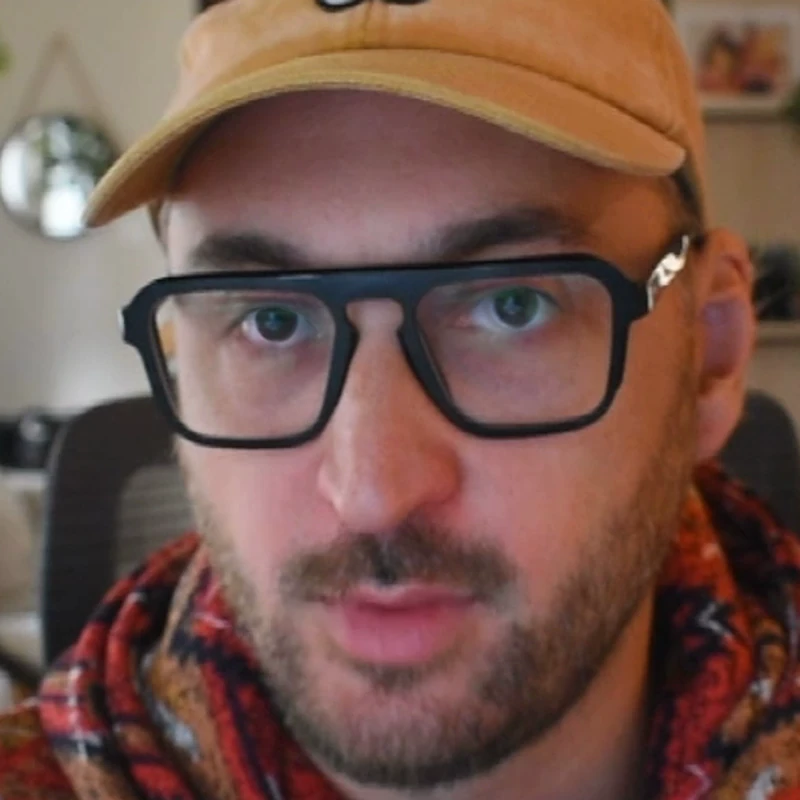
Eye Contact moves the subject's eyes so they look into the lens, for example when they read a teleprompter, look at notes or glance around the room. You give it one frame where the subject looks into the lens, and it puts those eyes on every frame, with nothing to track or mask. It works on one face per layer, the largest in the frame.
Getting started. When you apply the effect, the footage shows untouched and every control except Use Current Frame is grayed out. Move the playhead to a frame where the subject looks straight into the lens, eyes fully open, no blink, and click Reference > Set Frame > Use Current Frame. The eyes go to the lens on every frame and the other controls turn on. In DaVinci Resolve, connect the reference to the effect's second input instead.
The effect takes the reference's eyes and fits them onto every frame: reshaped to each frame's head pose, the iris drawn round at the look-into-the-lens spot, the lids at the reference's open height, and matched to the frame's lighting. Each frame keeps its own catchlight, blinks follow the real ones, and frames where the subject already looks into the lens keep their own eyes. It works whatever the source does: looking down at notes, iris in a corner, droopy lids. The eye texture comes from one frame, so fine detail is less alive far from the reference's head angle or lighting.
Requirements
- Mac: the face model runs through Core ML on the GPU and the Neural Engine. If Core ML fails, it runs on the CPU.
- Windows 64-bit: uses an NVIDIA GPU (CUDA) when available, otherwise the CPU.
2. Installation
2a. Baskl installer (all host apps)
Every Baskl plugin installs through the Baskl installer. It sets up AI Machine, the local engine the plugins run on, and puts Eye Contact in the right place for After Effects, Premiere Pro, OFX hosts (DaVinci Resolve, Nuke) and, on the Mac, Final Cut Pro. Close your host apps before running it.
macOS
- Click Download on baskl.ai, unzip
Baskl.Installer.zipand openMac/Baskl Installer.app. You need an Apple Silicon Mac; the installer stops on Intel Macs. - If macOS asks, confirm you want to open an app downloaded from the internet, then enter your Mac password so the installer can write to the system plug-in folders.
- Click Let's Get Started, select Eye Contact in the plugin list and click Install. The first install also downloads AI Machine, so give it a few minutes.
- When you see Installation Complete, restart your host app. The effect is in the Baskl category.
Windows
- Click Download on baskl.ai, unzip
Baskl.Installer.zipand runWindows\Baskl Installer.exe. - Click Yes when Windows asks to allow the app to make changes. The installer needs administrator rights.
- Click Let's Get Started, select Eye Contact in the plugin list and click Install. On NVIDIA cards the installer picks the matching CUDA build for you. The first install also downloads AI Machine, so give it a few minutes.
- When you see Installation Complete, restart your host app. The effect is in the Baskl category.
- If no face is found in a frame, that frame is left unchanged.
Activating your license
- After Effects / Premiere Pro: in After Effects, click Register at the top of the effect in Effect Controls (next to Reset), paste your license key and click Activate. In Premiere Pro, click the small icon button at the top right of the effect in Effect Controls to open the same dialog. The license is saved for the whole computer, so registering in one of the two apps covers the other.
- Final Cut Pro (Mac): select the effect in the viewer, click Register in the Video inspector, and enter your license key in the window that opens. The effect is under Baskl in the Effects browser. The first time Final Cut loads it, give it a few seconds to start.
- Resolve / Nuke: click Register at the top of the effect's controls, paste your license key and confirm. Once activated, the button reads License Info.
- Where to find your key: if you bought on baskl.ai, it is in your purchase email and under Account → My Licenses, with a Copy button. If you bought on aescripts + aeplugins, activate through the aescripts + aeplugins manager app, or paste the key from your aescripts account into the same Register dialog.
- Without a license, Eye Contact runs as a trial: everything works, but renders carry a watermark until you register. Activation needs an internet connection, and each key works on a limited number of computers (shown under My Licenses).
3. Parameters
Help and license
- Help / Contact
-
Opens the Baskl contact page with your plugin version filled in.
- Register
-
Resolve: opens the license window. In After Effects and Premiere Pro, click Options next to the effect name instead.
Look At
After Effects only.
- Look At
-
Pick a layer, for example a null, and the eyes look at it instead of the lens. Only the layer's position is used, not its pixels, and moving the layer updates the look. How far the eyes turn is limited, so a layer in a corner of the frame makes them look toward that corner. None (default) looks into the lens.
Reference
Give Eye Contact a frame where the subject looks into the lens and it puts those eyes on every frame. Use a frame from the same shoot and lighting, with the eyes fully open, a neutral expression and no blink. A reference from another shoot keeps its own catchlight, because the lights are in other places. Until a reference is set, the footage shows untouched and the other controls are grayed out. In DaVinci Resolve this group is not shown: connect the reference to the effect's second input. On the Fusion page, for a frame of the same clip, add a Time Stretcher on the clip, set its Source Time to that frame and connect it to the second input.
- Set Frame
-
After Effects and Premiere Pro: click Use Current Frame to store the frame at the playhead in Reference Frame.
- Reference Frame
-
The frame of this layer to take the eyes from. Once it is set you can type another frame. -1 (default) means no reference.
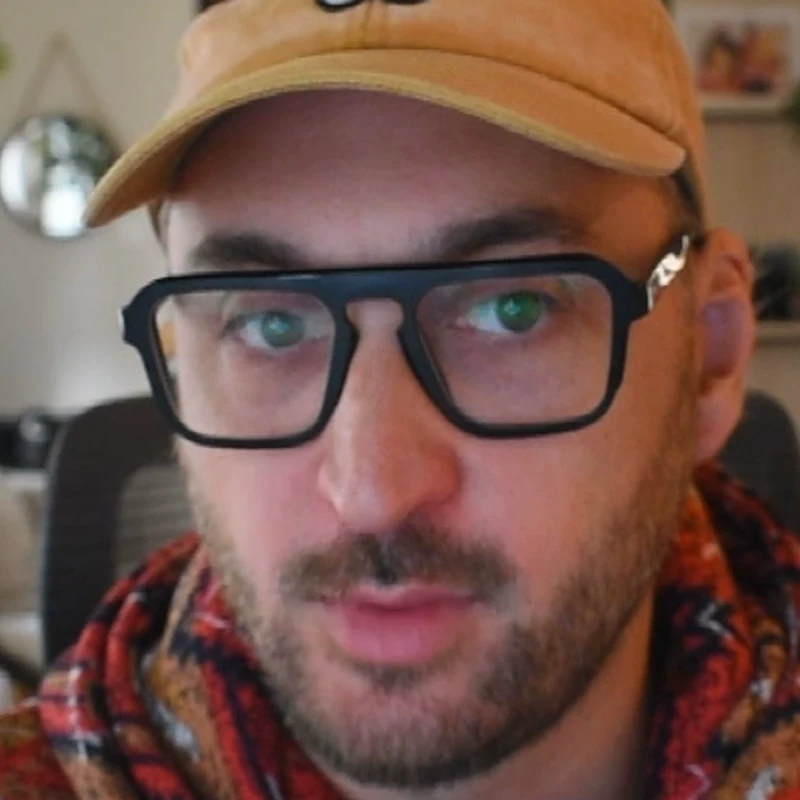
Reference Frame 31, Eyelid Follow 65%. - Reference Layer
-
Another layer to take the eyes from, for example a freeze frame or a photo of the person, at any size. It wins over Reference Frame, and is available once a Reference Frame is set. In DaVinci Resolve it is the effect's optional second input.
Fine Tune
- Strength
-
How far each eye goes from its own position to the reference's, the lids with it. 0% leaves the frame untouched. 0% to 100% (default 100%).
- Eyelid Follow
-
Where the lid line sits, from the subject's own lids (0%) to the reference's (100%). 0% to 200% (default 65%, as the full lift can look overdone).
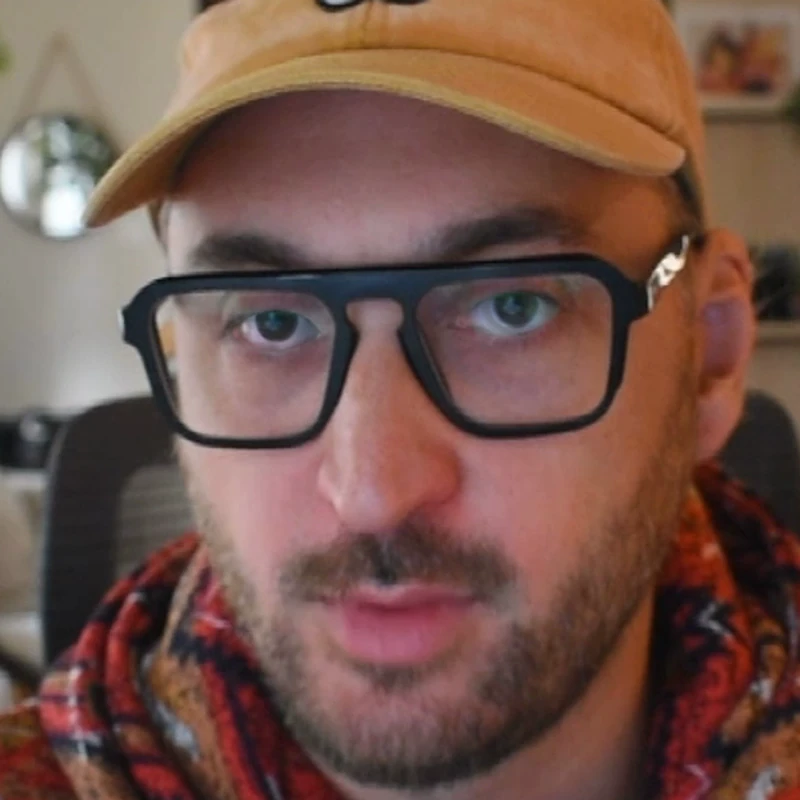
Reference Frame 31. Before: Eyelid Follow 0%. After: 65%. - Aim Horizontal / Aim Vertical
-
Moves the point the eyes look at, for faces the default camera target doesn't suit. Positive Aim Vertical looks higher. -100 to 100 (default 0).
- Smoothing
-
Steadies the face landmarks across frames. 0% to 100% (default 83%).
Output
- Output
-
What the effect renders.
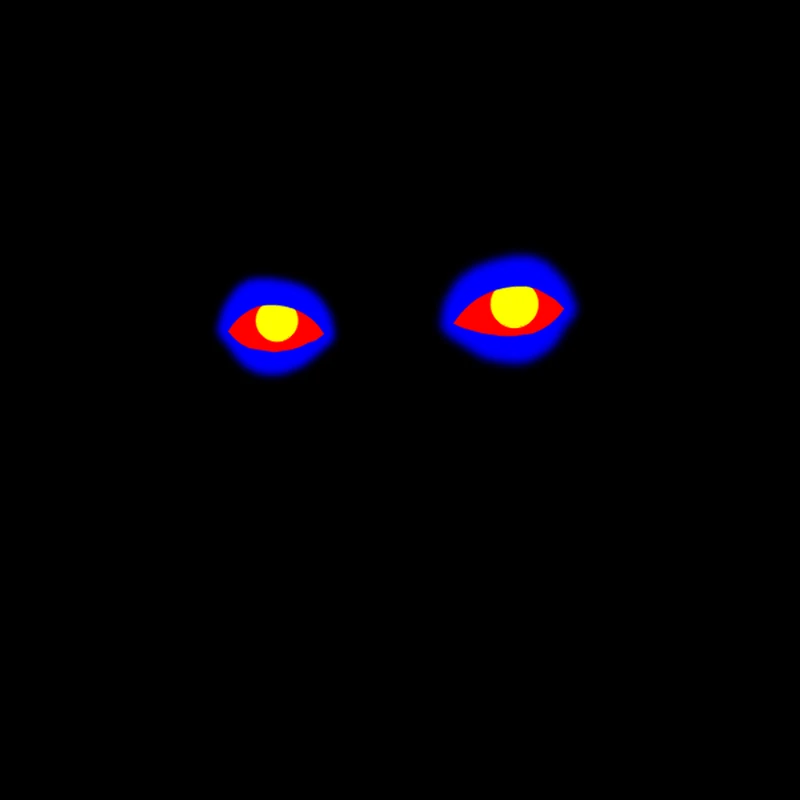
Reference Frame 31. Before: Result. After: Mask.